Salted Caramel Peanut Butter Chocolate Tart

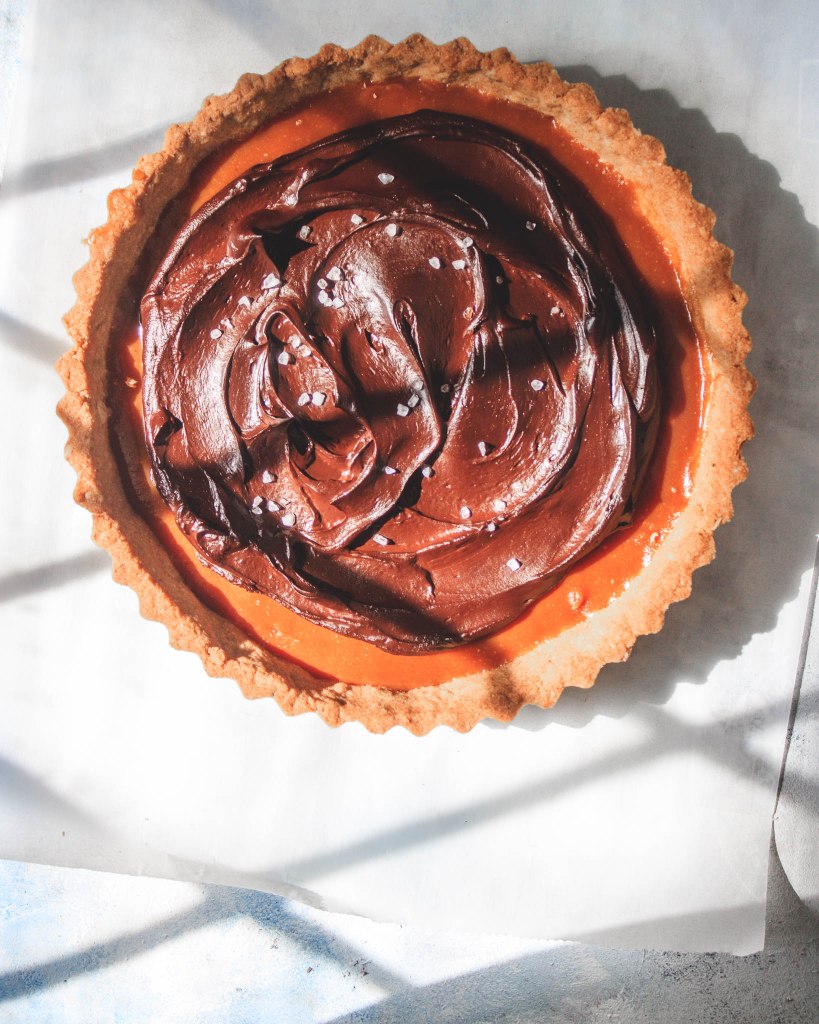
This Salted Caramel Peanut Butter Chocolate Tart has it all. There’s chocolate, peanut butter and salted caramel all in one bite. It doesn’t get much better than that! Plus a super buttery and nutty peanut crust that becomes deliciously toasty when baked. Although this tart has a few different elements, they’re all incredibly simple and quick to make.

What are these 3 delicious layers?

  1. Peanut Biscuit Crust made from peanuts, biscuits and melted butter
  2. Peanut Butter Salted Caramel made using homemade peanut butter and salted caramel
  3. Chocolate Ganache made using a combination of dark and milk chocolate + heavy cream

Notes:

*This recipe serves 7-8. It’s not a huge tart, but is quite rich, which is why I recommend serving small slices.
*I used peanut biscuits here for an extra nutty flavour. You can substitute with any biscuit of your choice: digestive biscuits, oreos, graham crackers..the possibilities are endless. However, do note that you might need to adjust the amount of butter depending on the kind of biscuit you use.
*You can absolutely use store-bought peanut butter here. The recipe uses only a couple of tablespoons, so it won’t make a huge difference. It will make this recipe a lot easier and quicker. I, however, like to overcomplicate everything. So, I made my own. I like homemade peanut butter because I can control the amount of sugar in the recipe since I make mine using only roasted peanuts and salt.
*I know I sprinkle flaky sea salt on top of everything, but on this tart, it is absolutely essential. That final sprinkle of saltiness is what brings it all together. If you’re in the mood for something fancier, add a little extra drizzle of peanut butter or salted caramel!
*While assembling the tart, make sure each layer is completely cooled before adding the next. This will ensure nice clean layers. This is especially important with the ganache layer. If spread on the caramel while still warm, it will melt into the caramel and become a mess.
*If you want to make this recipe ahead of time, make the shell and caramel layer and leave in the fridge. Prepare the ganache an hour before you want to serve and spread on top. Then leave to set at room temperature.
*The tart will keep in the fridge for 4-5 days, stored in an air-tight container.

Ingredients:

For the peanut crust:

  • 30g roasted peanuts
  • 130 g digestive biscuits or peanut flavoured biscuits
  • 100g unsalted butter, melted

For the peanut butter salted caramel:

  • 150 g caster sugar
  • 120ml heavy cream
  • 13g unsalted butter
  • 1/2 tsp fine sea salt
  • 2 tablespoons peanut butter

For the chocolate ganache:

  • 30 g dark chocolate (70% or above)
  • 30 g milk chocolate
  • 50 ml heavy cream (or a mixture of 30 ml heavy cream and 20 ml whole milk)

Method:

  • Pre-heat oven to 180C. To make the biscuit base, add the biscuits and peanuts to a food processor and process until a fine crumb forms. Transfer to a bowl and pour in the melted butter. Mix until you have something that resembles wet sand. Press into a 7 inch tart tin with a removable base, make sure it is pressed in tightly.
  • Bake for10-12 minutes just until the biscuit base starts to turn golden. Remove from the oven and set aside to cool.
  • For the caramel layer, add the sugar to a saucepan and cook over medium heat until it reaches a dark amber colour. Do not stir or the sugar will crystallise. Once it is dark and smoking, remove from heat and immediately whisk in the cream. Be careful as the mixture will bubble and splatter. Then add in the butter, salt and vanilla, and whisk to combine. Finally add in the peanut butter and whisk until smooth. Set aside to cool for 10 minutes and then pour onto the cooled biscuit base.
  • Place the tart into the fridge to set for at least 2-3 hours. You can even leave it in overnight. Once set, the caramel will be slightly firm.
  • To make the ganache, add both kinds of chopped chocolate to a heat-proof bowl and melt over a double-boiler. In another saucepan, add the cream and cook on low heat until just simmering. Do not boil. Remove both from heat and pour the cream into the chocolate. Use a balloon whisk to bring the ganache together. It should be silky and shiny.
  • If your ganache looks grainy or separated, add it to a saucepan over the lowest heat. Add in a teaspoon of warm milk at a time and use a balloon whisk to mix it in. As the ganache melts, it will become nice and silky again. Let cool for 10 minutes and then spread on top of the caramel layer, but not all the way to the edge. Finally sprinkle flaky sea salt on top and leave to set at room temperature for about an hour. If it is warm where you live, set in the fridge.

Dark Chocolate and Dulce de Leche Thumbprint Cookies

This easy Dark Cocoa and Dulce de Leche Thumbprint Cookie recipe includes intensely dark chocolate, creamy dulce de leche and a sprinkle of sea salt for the perfect sweet and salty treat. Cookies are amazing on their own, but top them with something glorious like dulce de leche and you’ve reeled me in! These cookies are absolutely delicious and the dulce de leche is so morish you’ll have to stop yourself eating it by the spoonful.

Notes:

*This recipe makes bout 10-11 small cookies.
*For an extra dark chocolate flavour, I like using 80% cocoa dark chocolate along with dutch-processed cocoa powder. You can use regular cocoa powder, but the melted chocolate must contain at least 65% cocoa, otherwise the cookies will spread too much.
*The dough must be chilled in the fridge for at least 30 minutes before shaping the cookies. And then chilled in the freezer for 15 minutes before baking. This helps the cookies hold their shape.
*Sometimes while baking, the cookies puff up and lose the indent in the middle. If this happens, use a 1/3 teaspoon and press into the baked cookies while still warm and soft.
*I used dulce de leche to fill these cookies, which was made by boiling a condensed milk can for 4 hours. You can fill these with any filling of your choice, salted caramel, nutella or peanut butter.

Ingredients:

  • 62 g unsalted butter, softened
  • 55 g caster sugar
  • 1 teaspoon vanilla extract
  • 1/2 teaspoon salt
  • 1 small egg yolk
  • 50 g dark chocolate, melted and cooled
  • 75 g flour
  • 12 g dutch-processed cocoa powder
  • 75 g dulce de leche

Method:

  • Preheat oven to 160°C.
  • In a large mixing bowl, add the softened butter and sugar. Using an electric mixer, whip until smooth and creamy (about 3-4 minutes).
  • Add in the vanilla, egg yolk and melted chocolate and mix to combine.
  • Finally sift in the flour, cocoa and salt. Mix until you have a sticky dough. Cover bowl with plastic wrap and chill in the fridge for 30 minutes.
  • Take the bowl out of the fridge, make tablespoon sized balls of the dough and place them on a cookie sheet lined with parchment paper. Use a finger or a 1/3 teaspoon to make indents in the middle of each ball.
  • Place the entire cookie sheet in the freezer for 15 minutes. Bake straight from the freezer for 12-14 minutes or until the cookies have spread slightly and are dry but not firm to touch. Let cookies cool completely on the tray, they will firm up as they cool.
  • Dollop about a teaspoon of dulce de leche in the middle of each cookie. Top with sea salt and enjoy.

Brown Butter Peanut Butter Cheesecake Bars

Brown Butter Peanut Butter Cheesecake Bars might be a mouthful to say but I guarantee they will win you over with just one bite. Any recipe name that features the word ‘butter‘ twice is a winner in my book. I’d made this recipe so many times but I had to try it again with brown butter. Of course, I think everything is much better with brown butter. The brown butter is really what sets these Brown Butter Peanut Butter Cheesecake Bars apart from all the other recipes out there. The toastiness from the brown butter just elevates the nutty flavour of the peanut butter so well. It should come as no surprise that brown butter and peanut butter are literally a match made in heaven.

Notes:
*All ingredients (especially the cream cheese and eggs) should be at room temperature for best results.
*The cheesecake is baked in a water bath, which ensures that the top does not crack.
*The cheesecake needs to set for at least 4 hours in the fridge after baking. It will not slice properly if not allowed to set.
*The cheesecake can be made a day or two in advance and stored in the fridge. Leftovers will last 4-5 days in the fridge, best stored in an air-tight container.
Notes on Ingredients:
*Peanut Butter: I use homemade peanut butter so I can control the amount of sugar in the bars. I make my peanut butter by processing warm roasted peanuts in a food processor with lots of salt. Feel free to use store-bough peanut butter, but please note that this will result in a much sweeter cheesecake, so you might want to cut back on the granulated sugar.
*Biscuits: For added peanut flavour, I love using peanut butter cookies. Alternatively you can add roasted peanuts to graham crackers or digestive biscuits before crushing them up. You can also use just biscuits, but I think the peanuts in the crust really heighten the nutty salty flavour.
*Cream Cheese: You really want to use the best cream cheese you can find for these bars. I love Philadelphia Cream Cheese for cheesecakes. If you can’t find this particular one, I recommend using a cream cheese block instead of the stuff that comes in tubs. Save that to spread on your bagels.

Ingredients:

  • 180 g peanut flavoured biscuits (see recipe notes)
  • 35 g salted butter
  • 285 g cream cheese, at room temperature
  • 2 eggs, at room temperature
  • 65 g granulated sugar
  • 90 g smooth peanut butter (see recipe notes)
  • 1/2 teaspoon vanilla extract
  • 1/2 teaspoon salt
  • 2 tablespoons flour

Method:

  • Pre-heat the oven to 180°C. Line a 7×7 in square baking pan with parchment paper, leaving an over-hang so the bars are easy to remove once baked.
  • Start by making the brown butter. Add the butter to a small saucepan over low heat. Cook the butter, whisking constantly until the butter has turned a brown colour. The milk solids will separate and turn dark, and the butter will give off a nutty aroma. Take off the heat and transfer to a heat-proof bowl. Leave to cool slightly, for about 5 minutes.
  • Meanwhile, crush your biscuits in a zip-lock bag or a food processor. Add to a mixing bowl and pour the browned butter on top. Once mixed, the mixture should resemble wet sand.
  • Transfer to the bottom of the baking pan and press down in an even layer. Use the back of a spoon or the bottom of a glass to really pack it tightly.
  • Bake for 10 minutes or until golden brown.
  • To prepare the cheesecake filling, add the cream cheese and sugar to a large mixing bowl. Mix using an electric whisk for about 2-3 minutes or until creamy and light.
  • Add in the eggs, one at a time. Then the vanilla, and salt. Then whisk in the peanut butter until combined. Finally, add in the flour and mix.
  • Pour cheesecake batter on top of the biscuit base. Tap the pan on your counter a couple of times to release any air bubbles. Place the pan inside a larger baking pan. Pour boiling water into the larger pan, up to 3/4 of the way up the smaller pan.
  • Bake for about 45 minutes or until the top is golden brown and just slightly wobbly in the middle.
  • Let cool at room temperature for 30 minutes and then chill in the fridge for 4 hours (or overnight) before slicing.

Apple Pie Brioche Doughnuts

I know it isn’t “officially” fall yet, but I am one of those annoying people who starts to think apple pie and hot chocolate as soon as September gets here.

If you’ve been following my blog for a while, you’d know my undying love for brioche doughnuts and apple pie. So with all of that fall anticipation in the air, I combined two of the best things in the world and the Apple Pie Doughnut was born! The “apple pie” flavour in this recipe comes from a cinnamon-spiced apple pie filling that’s generously piped into each doughnut. These doughnuts really are the best way to celebrate apple season – light and tender, perfectly rich without being heavy or sweet, flavoured with cozy spiced apples. 

Notes:
*This recipe makes 10-12 doughnuts, using a 2-inch round cutter or 5-6 doughnuts using a larger cutter. If you do not have a round cutter, use any round object with sharp edges.
*Unlike some of my other doughnut recipes, the filling need not be made a day ahead. You can make it while the doughnuts are proofing for the second time. Just make sure the filling is at room temperature before transferring to the piping bag.
*Although I have given proofing times, the actual time may vary depending on the weather. To test, press your finger into the dough and it should spring back slowly and not completely. Another indication of whether your doughnuts are properly proofed is a tan line in the middle of the doughnuts when fried.
*These doughnuts are best eaten the same day. When stored in the fridge, they may lose their light and pillowy texture.
*The brioche dough can be frozen for up to a month. Shape into a ball, place inside a freezer bag,  press all the air out and seal. When you want to bake with it, place in the fridge to thaw overnight. Then turn onto a floured surface and let it rest for 20 minutes.
*Temperature is important when frying the doughnuts. Cooking thermometers are cheap and make the frying process a whole lot easier. Ideally the oil should be at 175-180°C.

Ingredients:

For the brioche dough:

  1. 3 g active dry yeast
  2. 80 g milk, luke-warm
  3. 230 g all purpose flour
  4. 1/2 teaspoon salt
  5. 9 g caster sugar
  6. 2 eggs
  7. 35 g unsalted butter, soft and cubed

For the apple pie filling:

  1. 2 apples, cored, peeled and diced
  2. 1 tablespoon salted butter
  3. 2 tablespoons brown sugar
  4. 1 tablespoon caster sugar
  5. 1 teaspoon cinnamon
  6. 1 teaspoon vanilla extract
  7. 2 teaspoons flour

For assembly and frying:

  1. 300 ml vegetable oil
  2. 70 g caster sugar, for tossing
  3. 2 teaspoons cinnamon

Method:

To make the brioche dough:

  1. Mix the yeast with the warm milk, and let the yeast foam double in size.
  2.  To make the brioche dough, mix the flour, sugar, activated yeast, salt and eggs into the bowl of an electric mixer with a dough hook attachment and mix on medium speed for about 2 minutes, until it’s all combined. Then turn up the speed to medium high and let it run for about 5 minutes, or until the dough starts coming away from the sides and forms a ball.
  3. Slowly add the butter to the dough, a cube at a time. Once all the butter is incorporated, mix on high speed for 5 minutes until the dough is glossy, smooth and very elastic when pulled.
  4. Cover the bowl with plastic wrap and leave to proof in the bowl until it has doubled in size, about 1-2 hours. Punch down the dough, cover it and place in the fridge overnight.
  5. The next day, take the dough out of the fridge tip the dough out onto a lightly floured surface. Roll into a rough shape with 1 inch thickness. Using a 2 inch round cutter, cut as many doughnuts as you can. Re-roll and cut using the scraps. Place on a lightly oiled baking tray, leaving plenty of room for them – so they don’t stick together while they proof. Cover lightly with a towel and leave at room temperature for 20-25 minutes.

To make the apple pie filling:

  1. In a skillet over low heat, add the butter and let cook until slightly browned (about 2 minutes).
  2. Then add in the apples, cinnamon, salt and sugar. The apples will release water at this point. Cook until the apples are soft. Then add in the flour and mix until the liquid at the bottom has thickened.
  3. Take off the heat and stir in the vanilla. Leave aside to cool. Once cool, transfer to a piping bag.

To fry and assemble:

  1. Place the oil into a large heavy-bottomed pan set over medium-low heat. Let the oil reach a temperature of 175-180 degrees.
  2. While the oil comes to temperature, add the caster sugar and cinnamon to a bowl, mix and set aside. Line a baking tray with paper towels to absorb excess oil.
  3. Once at temperature, fry the doughnuts. Don’t overcrowd the fryer – do two to three per batch, depending on the size of your pan. Place on paper towel and then toss in sugar while doughnuts are still warm.
  4. Once done frying and coating, use a sharp knife to make a small hole into the sides of the doughnuts.
  5. Pipe the filling into the hole, making sure that a bit of it oozes out the top of the doughnut. Serve same day at room temperature.

Plum Sorbet

Not only does this Plum Sorbet look absolutely stunning (I mean, look at that colour!), it also packs a delicious fruity, tangy punch. I love making and eating ice cream, but a good sorbet is something different. It’s simple. It’s refreshing. And so full of summery-fruity flavours. I’m a huge fan of plums. They bring with them a distinct moreish tartness that just works so well in sorbet. Not to miss the stunning purple-ish colour when they’re broken down.

Recipe Notes:
*This sorbet recipe serves 5-6 people.
*The sorbet mixture must be chilled in the fridge before churning. You can chill it for 4-5 hours or overnight.
*This recipe uses an ice cream machine which keeps the sorbet smooth and prevents iciness. I have not tried making this recipe without one. If you do, let me know how it turns out.
*This recipe is fairly easy and uses minimal ingredients. However, it is important to be precise with your measurements, otherwise the sorbet will not freeze up to the correct consistency.
Notes on Ingredients:
*Plums: Plums are generally quite tart, but that’s what I really love about them. Use the skins too, there’s where all the flavour and colour comes from. If you prefer something sweeter, feel free to replace with any fruit of your choice. But please note that not all fruits are ideal for sorbet; berries work great, bananas..not so much.
*Alcohol: This recipe uses a couple of teaspoons of vodka. Is it absolutely necessary? No. But it will drastically improve the texture of your sorbet. The alcohol keeps the sorbet softer while it freezes. Without it, you will often end up with a solid icy block that doesn’t scoop as easily. Feel free to substitute with any alcohol you have on hand. You don’t really taste it, it’s mostly just there for texture.

Equipment:

  1. Ice-cream machine
  2. Blender

Ingredients:

  1. 650 g plums, weighed with seeds
  2. 55 ml water
  3. 100 g granulated sugar
  4. 2 teaspoons vodka
  5. 1 teaspoon lemon juice, freshly squeezed

Method:

  1. Remove the seeds of the plums and slice them. Add them to a saucepan with water and cook over low heat until the plums have softened and broken down. Keep stirring occasionally. This will take about 10 minutes.
  2. Once the plums have cooled down slightly, add them to a blender and process until smooth.
  3. Take about a third of the plum puree and add it to the same saucepan with the sugar. Cook on low heat just until the sugar has dissolved.
  4. Stir into the rest of the plum mixture.
  5. Add in the vodka and lemon juice and stir to combine.
  6. Chill the mixture in the fridge for at least 4 hours or overnight.
  7. When the sorbet mixture is chilled, churn the sorbet in your ice cream machine according to manufacturer’s instructions.
  8. Place in a freezer-safe container with a lid and freezer for an additional couple of hours until it reaches a scoop-able consistency.

Salted Caramel Cheesecake

This cheesecake combines two of my most favourite things in the world – salted caramel and cheesecake. It is so utterly delicious. How can it not be? Sweet, salty, bitter caramel folded inside tangy cheesecake batter, which is then generously poured on top of the baked cheesecake as well. This cheesecake is an absolute dream.

Recipe Notes:
*This is a small-batch recipe that makes one small 6-inch cheesecake that will serve 4-5 people.
*The caramel needs to be made ahead of time so it can set in the fridge.
*The cheesecake needs to set for at least 4 hours in the fridge after baking. It will not slice properly if not allowed to set.
*The cheesecake can be made a day or two in advance and stored in the fridge. Leftovers will last 4-5 days in the fridge, best stored in an air-tight container.
Notes on Ingredients:
*Biscuits: Use any biscuits you like. I love experimenting with different biscuits for my crust. Some great options are graham crackers, digestive biscuits, gingersnaps, oreos.
*Cream Cheese: 90% of this cake is cream cheese, so you really want to use the best you can find. I love Philadelphia Cream Cheese for cheesecakes. If you can’t find this particular one, I recommend using a cream cheese block. Skip the cream cheese that comes in a tub.
*Eggs: It is really important that you use room temperature eggs for this recipe. Otherwise your batter will just not have the smooth, creamy consistency we need.
*Greek Yogurt: Traditional cheesecake recipes use sour cream. However, sour cream isn’t easy available in Indian supermarkets, which is why I adapted this recipe to include yogurt. You may also use regular store-bought yogurt, it doesn’t have to be Greek. However, please do not use curd that has been set at home, only store-bought works here.

Ingredients:

For the caramel:

  1. 100 g granulated sugar
  2. 45 g unsalted butter, cubed and at room temperature
  3. 50 ml heavy cream, at room temperature
  4. 1 teaspoon sea salt

For the cheesecake:

  1. 100 g digestive biscuits, crushed in a food processor
  2. 3 tablespoons butter, melted
  3. 475 g cream cheese, at room temperature
  4. 80 g sugar
  5. 2 eggs, at room temperature
  6. 1 tablespoon flour
  7. 1/2 teaspoon vanilla extract
  8. 3 tablespoons salted caramel sauce
  9. 4 tablespoons Greek yogurt

Method:

  1. Start by making the salted caramel as it needs time to set in the fridge. Make sure you have all your ingredients measured out and placed next to the stove. Place the sugar in a saucepan and cook over low heat. Do not stir.
  2. Let the sugar come to a deep amber colour and then take off the heat. Add in the cubes of butter and whisk together. Then add in the heavy cream and salt. Stir until smooth.
  3. Transfer to a glass jar and let cool slightly. Then place in the fridge while you make the cheesecake.
  4. Preheat oven to 160°C. Line a 6 inch loose-bottom cake pan with parchment paper. Grease the sides with butter and Set aside.
  5. In a mixing bowl, add the crushed biscuits and melted butter. Mix until you have a mixture that looks let wet sand. Transfer to the bottom of the cake pan and use the back of a spoon to press the crust to the bottom and going up the sides a bit. Bake for 11-12 or until golden.
  6. In a large mixing bowl, add the cream cheese. Use a whisk to beat the cream cheese until light and creamy. Switch to a spatula and fold the cream cheese to knock out some of the air. Fold in the flour and sugar.
  7. In a small bowl, beat the eggs, yogurt, caramel and vanilla with a fork and then fold into the cheesecake mixture.
  8. Pour batter over the crust. Cover the bottom (outside) of the pan in two layers of aluminium foil. Then place the pan in a larger pan. Pour boiling water in the larger pan so it comes 3/4th of the way up to the pan inside.
  9. Bake for 60-70 minutes on the middle rack of the oven. You will know the cheesecake is done when the edges are golden, slightly puffed up and the centre is still slightly wobbly. Turn the oven off and let cool for an hour with the oven door cracked open slightly.
  10. Then pour the leftover caramel sauce along with some sea salt flakes on top and place in the fridge for at least 4 hours before slicing and serving.

Sticky Date Cake with Salted Caramel Chocolate Ganache

I love a warm toffee pudding on a stormy day. But sometimes I find that toffee pudding along with that rich butterscotch sauce can be so overly sweet. This cake combines those familiar pudding flavours and pairs them with a bitter, dark salted caramel chocolate ganache – balancing the sweet dates with the salty, bitter topping. The cake is deliciously moist and is subtly spiced with cinnamon, so the date flavour can really shine!

Notes:
*I have used 75% dark chocolate for the salted caramel chocolate ganache. However, I have previously made this ganache using milk chocolate as well. The texture of the ganache might vary depending on the kind of chocolate you use. If you find your ganache is grainy, whisk in a couple of teaspoons of heavy cream and it should come together.

Ingredients:

For the cake:

  1. 220 g dates, pitted and chopped
  2. 250 g water, boiling
  3. 3/4 teaspoon baking soda
  4. 100 g unsalted butter, at room temperature and cubed
  5. 110 g brown sugar
  6. 1/2 teaspoon vanilla extract
  7. 2 eggs
  8. 150 g flour
  9. 2 teaspoons baking powder
  10. 1 teaspoon cinnamon

For the ganache:

  1. 50 g dark chocolate, chopped
  2. 50 g sugar
  3. 10 g unsalted butter
  4. 1/2 teaspoon salt
  5. 102 g heavy cream

Method:

  1. Start by making the ganache as it needs time to set in the fridge. Place the chopped chocolate in a large, heat-proof bowl.
  2. In a saucepan, add the sugar and cook over medium heat until it turns a dark amber colour. Add in the butter and salt and mix to combine.
  3. Then add in the cream. The mixture will splatter, so be careful. If it has lumps, place on a low heat and stir until everything is smooth.
  4. Pour the hot salted caramel over the chopped chocolate and let it sit for 2 minutes. Then stir together until smooth. Place in the fridge to set.
  5. Preheat oven to 160°C. Line a deep rectangular sheet pan with parchment paper.
  6. Add the dates, boiling water and baking soda to a small bowl and leave for 5-6 minutes.
  7. Add the dates along with the water to a blender. Then add in the vanilla, eggs, butter and brown sugar. Process until you have a smooth mixture.
  8. Next add in the flour, baking powder and cinnamon and process for a few seconds until just combined. Do not over-mix.
  9. Transfer to the baking pan and bake for 40-45 minutes or until a toothpick inserted comes out clean. Allow to cool in the pan for 10 minutes before removing and letting cool completely.
  10. Once cool, remove the ganache from the fridge and whisk until smooth and glossy. If the ganache looks grainy, add a few teaspoons of heavy cream and whisk in. Spread over cooled cake.

Espresso Cinnamon Rolls with Cream Cheese Glaze

With these Espresso Cinnamon Rolls, you can definitely have your coffee, and eat it too! Espresso, cinnamon and brown sugar come together to form a warm, spicy filling which is then wrapped around my favourite sweet, fluffy dough. The tangy, vanilla-speckled cream cheese glaze brings it all together to form the most comforting breakfast dessert ever.

Notes:
*This recipe makes about 10-12 cinnamon rolls.
*Espresso can be replaced with instant coffee.
*The milk should be luke-warm, not hot. Otherwise you might kill the yeast.

Ingredients:

For the dough:

  1. 85g luke-warm milk
  2. 5g active dry yeast
  3. 285g flour
  4. 1/2 teaspoon fine sea salt
  5. 25g granulated sugar
  6. 80g unsalted butter, cubed and at room temperature
  7. 2 large eggs, at room temperature
  8. 1 tablespoon ground espresso powder

For the filling:

  1. 20g unsalted butter, at room temperature
  2. 75g light brown sugar
  3. 1 tablespoon ground cinnamon
  4. 1 tablespoon ground espresso powder

For the icing:

  1. 70g powdered sugar
  2. 37g cream cheese
  3. 1-2 tablespoons milk
  4. 1/2 teaspoon vanilla extract

Method:

  1. In a small bowl, add the warm milk, yeast and 1 tablespoon out of the 25 g of granulated sugar needed for the dough. Mix until combined at set aside.
  2. In a large bowl, add the flour, espresso, the rest of the granulated sugar and salt. Using a stand or electric mixer with a bread-dough hook, running on low, slowly add in the yeast mixture. Next add in the eggs one at a time and mix until well incorporated.
  3. Add in the butter, one cube at a time. Wait for each cube to get incorporated before adding in the next.
  4.  Turn up the speed to medium-high and let the dough knead for about 10 minutes.
  5. Cover the bowl with plastic wrap and allow to rest in a warm spot until doubled in size. Then place in the fridge overnight.
  6. The next day, before you take out the dough from the fridge, prepare your filling. Add the cinnamon, espresso and brown sugar to a bowl and whisk to remove any lumps.
  7. Next, take out your dough and place on a lightly floured surface. The colder the dough, the easier it will be to roll out.
  8. Roll the dough into a 1.2″ thick rough rectangular shape. It doesn’t need to be perfect, but should be almost twice as long as it is wide.
  9. Next spread the room temperate butter on to the rolled out dough, leaving a small border from all sides. Coat the butter with the cinnamon-espresso sugar, making sure you cover the entire surface well.
  10. Using the the long edge of the rectangle away from you, start rolling towards you to form a tight log.
  11. Using a sharp knife, cut into 1 1/2″ thick rounds and place onto a baking tray leaving an inch of a space between each of them.
  12. Lightly cover with a kitchen towel and allow to proof for another 2 hours in a warm space.
  13. When ready to bake, place the baking tray in an oven pre-heated at 180°C. Bake for 23-27 minutes or until golden brown.
  14. Meanwhile, prepare the glaze. In a bowl, add in the powdered sugar, vanilla and a tablespoon of the milk. Mix to combine until you have a very thick glaze (you may need more of the milk). Next, add in the cream cheese and whisk well to combine.
  15. Let the cinnamon rolls cool for 10 minutes before glazing.

Mango Ice Cream

For as long as I can remember, I’ve been making this No-Churn Mango Ice Cream every summer. However, I recently bought an ice cream maker, and ever since, I’ve felt the need to have freshly churned ice cream in the freezer at all times. I’m worried I might have a nervous breakdown if there wasn’t.

This mango ice cream has my heart. It’s filled with sunshine and summer. With a smooth-as-anything texture, intensely flavoured and fragranced with the juiciest mangoes, it really is the best way to celebrate the mango season.

Notes:
*This recipe makes enough ice cream for 5-6 servings.
*Mango makes up a very large proportion of this recipe so it’s really important that you use very sweet, flavourful, ripe mangoes.
*Be careful not to over-cook the mango curd. It will develop an eggy taste and grainy texture if you do. The curd should be thick enough to coat the back of a wooden spoon.
*Straining the curd is another important step. It ensures a smooth and creamy ice cream.

Equipment:

  1. Ice-cream Maker
  2. Food Processor / Blender

Ingredients:

  • 1 1/2 cups fresh mango, diced
  • 3 egg yolks
  • 1/4 cup granulated sugar
  • 1 teaspoon vanilla extract
  • 1 cup heavy cream
  • 1 cup whole milk

Method:

  • Place the mango, egg yolks and sugar in a blender and process until you have a smooth mixture.
  • Pass the mixture through a sieve and then transfer to a saucepan. Cook over low heat, whisking constantly, until thick enough to coat the back of a spoon. Let it come to a boil and then immediately transfer to a heat-proof bowl.
  • Whisk in the vanilla, milk and cream.
  • Chill the mixture in the fridge for at least 2-3 hours (or overnight).
  • Set up your ice cream machine according to manufacturers instructions and churn the mixture for the required amount of time.
  • Pour churned ice cream into a freezer-proof container with a lid and place in freezer for at least 4 hours before consuming.

Mango and Lime Bars

It’s hard to imagine anything more iconic to an Indian summer than mangoes. These mango lime bars are rich, creamy and bursting with tropical flavours. Everything about these scream the quintessential summer dessert. The recipe starts with a buttery and light shortbread crust, which is then topped with a creamy lime-infused mango curd. These bars are truly irresistible and the best way to make use of mangoes this summer!

Ingredients:

For the shortbread base:

  1. 100 g butter, at room temperature
  2. 30 g granulated sugar
  3. 140 g flour

For the mango curd:

  1. 75 g mango, diced
  2. 2 eggs
  3. 145 g granulated sugar
  4. 35 g flour
  5. 100 g lime juice
  6. 1 teaspoon lime zest

Method:

  1. Pre-heat the oven to 180 degrees. Line a 7×7 square pan with butter and parchment paper.
  2. To make the shortbread, in a mixing bowl, add the butter, sugar and flour and mix together until combined. Press at the bottom of the pan ensuring you have a smooth even layer. Bake for 20-25 minutes until golden brown.
  3. Meanwhile, make the mango curd. In a food processor, add the diced mango along with the sugar and eggs. Blend until completely smooth. Transfer to a mixing bowl and whisk in the lime juice and zest. Finally fold in the flour. Pour on top of shortbread base and bake for 25-30 minutes or until centre is no longer wobbly. The bars will continue to set as they cool. Refrigerate and slice into squares.